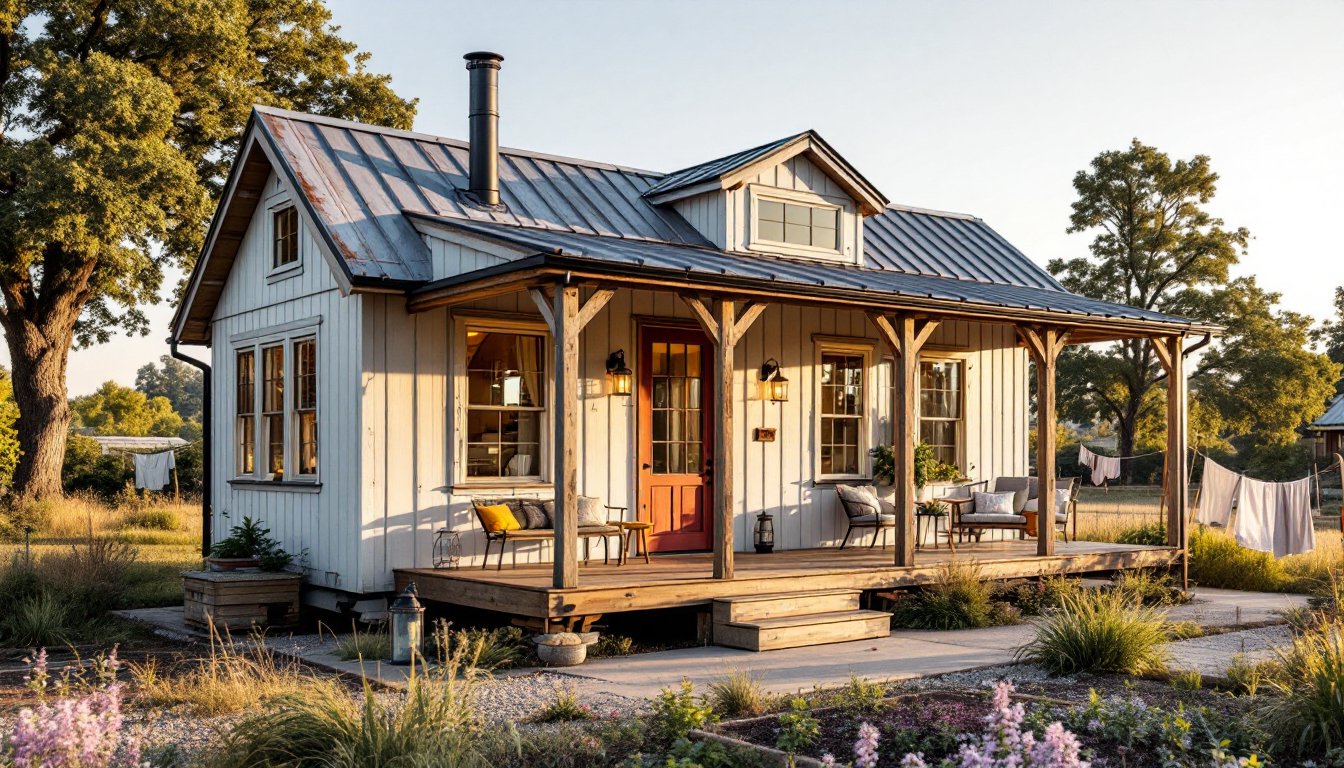
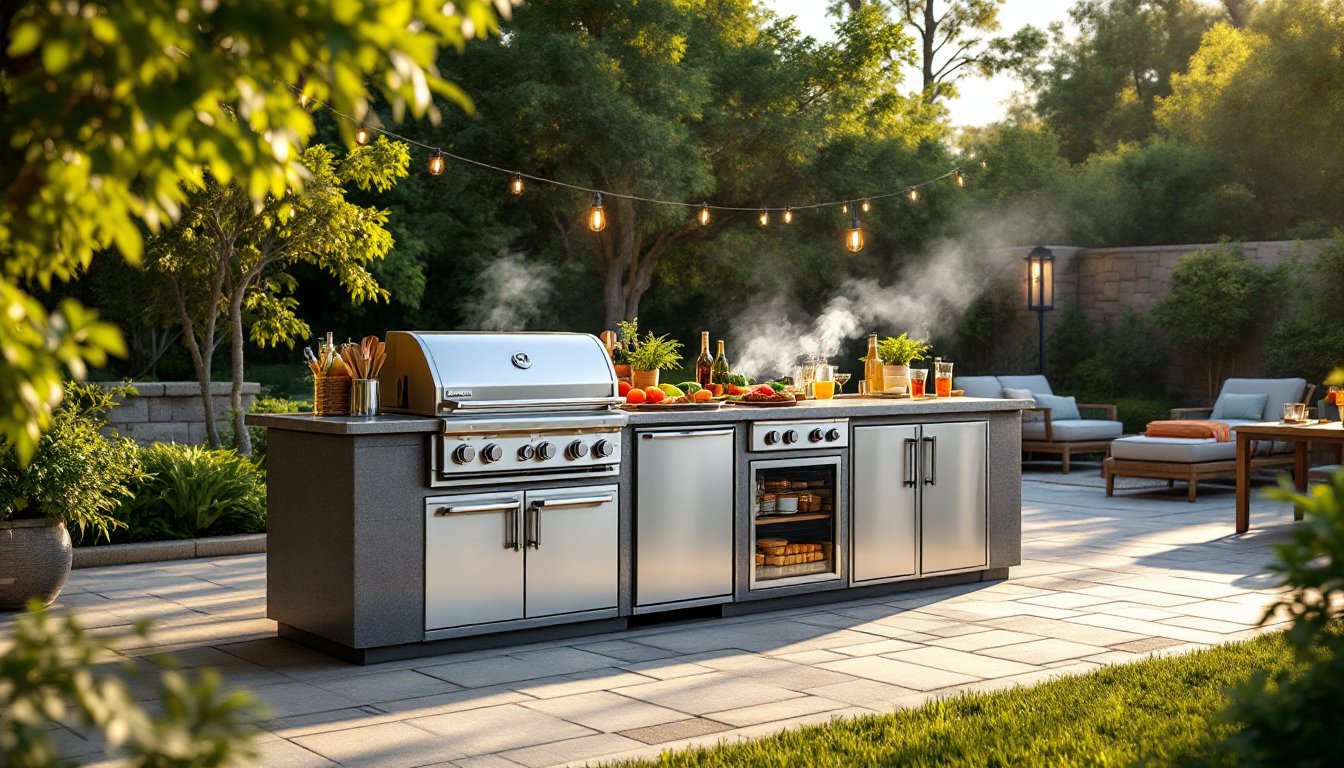
An outdoor kitchen island becomes the natural centerpiece of backyard entertaining, a place where cooking and conversation merge seamlessly. Home Depot‘s growing selection of outdoor kitchen islands makes it easier than ever to add functional cooking space and social gathering zones without a major renovation. Whether you’re a weekend griller or a serious outdoor chef, these islands range from affordable modular units to fully equipped prefab builds that handle anything from burgers to elaborate dinner parties. This guide walks you through selecting, installing, and maintaining a Home Depot outdoor kitchen island that suits your space, budget, and entertaining style.
Table of Contents
ToggleKey Takeaways
- A Home Depot outdoor kitchen island streamlines entertaining by integrating cooking, prep, and storage into one footprint, eliminating constant trips between house and patio.
- Home Depot outdoor kitchen islands range from $800–$1,200 entry-level units to premium $2,500–$5,000+ models with integrated sinks and mini-fridges, with availability peaking April through June.
- Prefab islands offer simpler installation but limited customization, while modular units provide flexibility for future reconfiguration and unusual spaces.
- Counter space of at least 24 inches on both sides of the grill, durable stainless steel (304 or 316 grade) construction, and weather-sealed storage are essential for functionality and longevity.
- Proper installation requires a level patio, professional gas and electrical hookups, and ongoing maintenance including monthly deep cleans and annual hardware inspections to prevent corrosion and safety hazards.
- Strategic placement with clear traffic zones, surrounding pavers, and landscape lighting transforms your outdoor kitchen island into an intentional entertaining centerpiece rather than an isolated appliance.
Why Choose a Home Depot Outdoor Kitchen Island for Your Backyard
A Home Depot outdoor kitchen island offers several practical advantages over cooking at a traditional grill. Most units arrive partially or fully assembled, cutting weeks of custom build time. They’re engineered to handle weathering, typically built with stainless steel, powder-coated steel, or marine-grade materials that resist rust and UV damage far better than DIY improvisation.
These islands also simplify workflow. Unlike a standalone grill, an island integrates counter space, storage, prep surfaces, and sometimes a sink into one footprint. That means you’re not walking back and forth between kitchen and patio during dinner service. Guests stay engaged instead of watching the cook disappear.
Home Depot islands come with clear installation guides and local delivery options. If plumbing or gas hookups are needed, you’ll know upfront what’s involved. That transparency beats sourcing mismatched components and hoping they fit together, a common DIY trap.
Top Outdoor Kitchen Island Models Available at Home Depot
Home Depot stocks islands across several price tiers, from basic two-burner stainless steel units ($800–$1,200) to elaborate modular islands with sinks, mini-fridges, and storage cabinets ($2,500–$5,000+). Popular brands include Sunjoy, Outsunny, and various house brands that rotate seasonally.
Entry-level islands typically feature a single or double-burner grill, a side burner, basic countertop space, and perhaps one shelf underneath for propane tank storage. Mid-range units add stainless steel construction throughout, larger cooking surfaces, and integrated side tables. Premium models include features like natural gas conversion kits, storage drawers with weather-sealed latches, and marble or granite countertops.
Availability fluctuates by season and location. Summer stock peaks April through June: winter months see deeper discounts but limited selection. Check Home Depot’s website for real-time inventory and local delivery options, shipping a 400-pound island cross-country isn’t practical.
Prefab vs. Modular Options
Prefab islands ship as a single assembled (or nearly assembled) unit. Setup is often a matter of attaching legs, connecting gas, and positioning on your patio. They’re ideal if you know your final location and aren’t moving soon. Downsides: limited customization, and delivery logistics matter, stairs, tight gates, or uneven ground can complicate placement.
Modular units break into sections that you bolt together on-site. They offer flexibility: you can rearrange components, add side burners or fridges later, or adapt to unusual spaces. The trade-off is more assembly time and more parts to keep track of. If you plan to reconfigure your layout or relocate the island eventually, modular wins. For a permanent, main-event centerpiece, prefab’s simplicity is appealing.
Key Features to Look For When Selecting Your Island
Cooking surface size matters. A single-burner island suits light grilling: two burners handle weeknight dinners and modest entertaining. Four-burner units with a side burner are restaurant-adjacent and worth the extra cost only if you’re genuinely cooking for groups multiple times a month.
Counter space on both sides of the grill is non-negotiable. A minimum of 24 inches of usable counter on each side prevents the awkward shuffle of juggling plates and prep work. Look for islands with a back counter (against a wall or fence) and a front counter facing the living area, that creates a real workflow.
Material durability determines lifespan. Stainless steel (304 or 316 grade) resists corrosion: painted steel or powder-coated aluminum are cheaper but need touch-ups every few years. Check whether the grate and firebox are cast iron or stainless, cast iron requires seasoning and oil: stainless is lower-maintenance.
Storage separates a convenience upgrade from actual functionality. A simple open shelf works for propane tanks, but sealed cabinets keep weather and pests out. Drawers with weather-tight seals and stainless hardware last longer than hinged doors that sag over time.
Utilities depend on your needs. Gas (propane or natural gas) is standard: electric side burners are nice for sauces or griddle work. If you cook year-round or entertain frequently, a small refrigerator or cooler drawer ($300–$800 add-on) eliminates trips inside. Sinks require plumbing, manageable if your patio is near an outdoor faucet, more involved otherwise.
Also consider island height and stool compatibility. Most are 36–38 inches tall, matching standard kitchen counters. If you want bar seating on one side, ensure 24–26 inches of knee clearance between counter and floor for stools.
Installation and Setup Essentials
Before ordering, measure your space carefully. Account for three feet of clearance on the cooking side and at least two feet behind and on either flank for movement and safety. Islands typically run 36–48 inches wide and 24–30 inches deep: confirm dimensions match your footprint.
Surface preparation is crucial. The patio must be level, islands settle unevenly on sloped ground, causing water pooling and alignment headaches. Use a 4-foot level to check your patio. If the ground slopes, a few pavers or shims under the island’s feet solve minor discrepancies (up to 2 inches). Anything steeper requires regrading, which may demand a contractor.
Gas connections require care. Propane islands use a quick-disconnect hose rated for outdoor use: check that your setup includes a regulator and that you’re using a certified propane tank with proper labeling. Never improvise fittings, leaks are safety hazards. If converting to natural gas, a licensed gas professional is worth the $200–$400: mistakes here are genuinely dangerous. Local building codes (often tied to the International Fuel Gas Code, IFGC) may require permits for gas work, ask your jurisdiction.
Electrical hookups, if the island has an electric side burner or fridge, require a 15 or 20-amp outdoor-rated circuit and a GFCI (ground-fault circuit interrupter) outlet within 6 feet. This isn’t a DIY job if you lack electrical experience: hire a licensed electrician.
After setup, run the grill at high for 15 minutes to season new surfaces and burn off any manufacturing residue. Check all connections for gas leaks using soapy water, bubbles indicate leaks. Tighten fittings and retest before your first cook.
Assembly typically takes 2–4 hours, depending on model complexity. Don’t rush. A second pair of hands makes alignment and bolting easier, and extra eyes catch misaligned parts before they’re over-tightened.
Maintenance and Care Tips for Long-Lasting Use
Cleaning after each use extends life significantly. Wipe down stainless steel surfaces with a microfiber cloth and mild soap: dry immediately to prevent water spots. Scrape the grate while still warm (wear heavy-duty grilling gloves) to remove food and grease buildup. Empty grease traps before they overflow, clogged traps cause fires.
Monthly deep cleans tackle grime and corrosion. Use a stainless steel cleaner and a soft brush on all surfaces, avoid abrasive scrubbing pads that scratch finish. For cast-iron grates, apply a light coat of high-heat cooking oil after cleaning to prevent rust.
Seasonal prep protects against weather damage. In autumn, drain propane tanks and store them upright in a cool, ventilated shed (never indoors). Cover the island with a weather-resistant grill cover, breathable fabric prevents moisture trapping underneath. In spring, inspect the cover for mold, replace if needed, and clean the entire unit before season’s open.
Winter storage is ideal if you live in freezing climates. Disconnect the gas, drain any water lines or sinks, and store removable components indoors. If the island stays outside, ensure water doesn’t pool on the top or in corners, a slight slope toward drainage points, or regular removal of standing water, prevents ice damage.
Inspect hardware annually. Check bolt and screw tightness, especially around the firebox and grates. Weather and thermal cycling loosen fasteners: a few minutes with a wrench prevents wobbly assembly. Replace any corroded or missing hardware with stainless steel bolts and fasteners, they resist rust far better than zinc-plated alternatives.
Reseal stone countertops (granite or marble) every 1–2 years using a food-safe outdoor stone sealer. Without resealing, stains and water damage penetrate the stone. Wood frames or accents need periodic staining or sealing as well.
Design Ideas and Layout Considerations for Your Space
An outdoor kitchen island works best when anchored to your patio’s existing flow. If your patio faces a seating area, angle the island’s serving counter toward that zone, guests naturally gravitate to the bar and mingle. Avoid placing the island’s cooking side against a wall: it traps heat and smoke, and limits movement behind the grill.
Surrounding materials shape the whole look. A gravel or paver foundation under and around the island anchors it visually. Pavers also shed water better than dirt and define the entertaining space. Consider extending pavers 3–4 feet out from the island on the “public” side, that’s the gathering zone where guests stand with drinks.
Sightlines matter. From the house, the island should be inviting and visible at night. Plan for landscape lighting, solar post lights flanking the island or a small string lights overhead create atmosphere and safety. Avoid placing the island where early sunset shadows from trees or structures darken your cook zone by 4 p.m.
Designers at Houzz and outdoor living publications like Southern Living showcase islands integrated with ambient furniture: a low dining table nearby, lounge seating slightly behind, and bar seating on one side of the island. That layering, cooking zone, casual dining, deep relaxation, feels intentional rather than an island plopped randomly.
Color and material harmony tie the space together. If your patio is stone, consider an island frame that echoes that color. Stainless steel islands pair cleanly with modern landscaping: bronze or darker finishes feel warmer in traditional yards. Countertop materials should complement nearby surfaces, a granite island top that matches your house’s exterior stone feels planned.
Zones for different activities prevent congestion. Designate the island’s cooking side as “chef’s zone”, only the cook and one helper should move there during meal prep. The bar-height counter becomes the “guest zone” where friends lean, sip, and chat. A nearby side table becomes the “holding area” for plated food en route to the dining table. That separation keeps traffic flowing and prevents the awkward squeeze when a dozen people cluster around one grill.