Building a home theater in Raleigh doesn’t mean emptying your wallet on high-end equipment or hiring a contractor to gut your living room. Modern home theater setups range from modest two-speaker systems to full surround-sound configurations, and Raleigh homeowners have access to solid local retailers and installers who can guide the process. Whether you’re converting a basement, spare bedroom, or corner of your living room, understanding the core components, and knowing when to call in a professional, separates a mediocre viewing experience from one you’ll actually want to spend time in. This guide walks you through what makes a home theater work, how to plan your space, and where to source equipment and expertise locally.
Table of Contents
ToggleKey Takeaways
- A quality home theater in Raleigh requires four core components: display, audio system, source device, and control infrastructure, with audio deserving 40–50% of your total budget for the best results.
- Home theater systems add real estate value for Raleigh homeowners and solve practical problems like family entertainment without competing screens or expensive theater outings.
- Start with a 5.1 speaker configuration using a center speaker at ear level, front speakers angled toward the listening area, and surround speakers placed high on walls for optimal sound placement.
- Most Raleigh homeowners find the best value in mid-range systems ($4,000–$8,000) featuring a 65–75-inch 4K TV and proper 5.1 audio rather than premium setups that require dedicated spaces.
- Invest in acoustic treatment and blackout capability to eliminate reflections and unwanted light, then hire local Raleigh professionals for structural and electrical work while handling speaker calibration yourself.
- Avoid buying all equipment at once; start with your display and main speakers, then add surrounds and subwoofers after a month to match your room’s actual acoustic needs.
Why Raleigh Homeowners Are Investing in Home Theater Systems
Streaming services are better than ever, but a TV mounted on the wall with tinny speakers doesn’t cut it anymore. A proper home theater amplifies content, movies feel immersive, sports have real impact, and gaming responds with clarity. For Raleigh homeowners, a home theater also adds real estate value. Buyers see a finished entertainment space as a lifestyle upgrade, and the resale bump often outpaces the initial investment, especially if the work is done cleanly.
Beyond resale appeal, home theater solves a practical problem: family time. Instead of splitting attention between screens or hauling everyone to a theater, you control the experience at home. You pause for snacks, adjust temperature and lighting on your terms, and avoid sticky floors and $8 candy. For families with young kids or households where members have different schedules, a dedicated viewing space anchors shared moments.
Essential Components for a Quality Home Theater Setup
A functional home theater needs four core pieces: a display, an audio system, a source device, and control. Your display is the anchor, typically a 4K projector and screen for rooms over 12 feet deep, or a large-format TV (55–85 inches) for smaller spaces. A 4K projector delivers immersion but requires a darkened room: a TV is more flexible and works in partially lit spaces.
Your source device feeds content: a streaming box like Roku or Apple TV, a Blu-ray player, or a gaming console. Most homes stack multiple sources, so a basic AV receiver routes them to your display and speakers. Don’t skimp on the receiver, a quality unit from Denon, Yamaha, or Onkyo ensures clean signal handoff and gives room to grow your speaker system later.
The final piece is infrastructure: HDMI and optical cables (use quality shielded versions to avoid interference), power conditioning to protect equipment from surges, and cable management to keep things tidy. Cheap cables invite intermittent dropouts: spend 15–20% of your speaker budget on decent wiring.
Audio Systems and Speaker Placement
Audio makes or breaks a home theater. A $2,000 projector paired with bargain speakers sounds worse than a $1,000 TV with good audio. Aim to spend at least 40–50% of your budget on audio components.
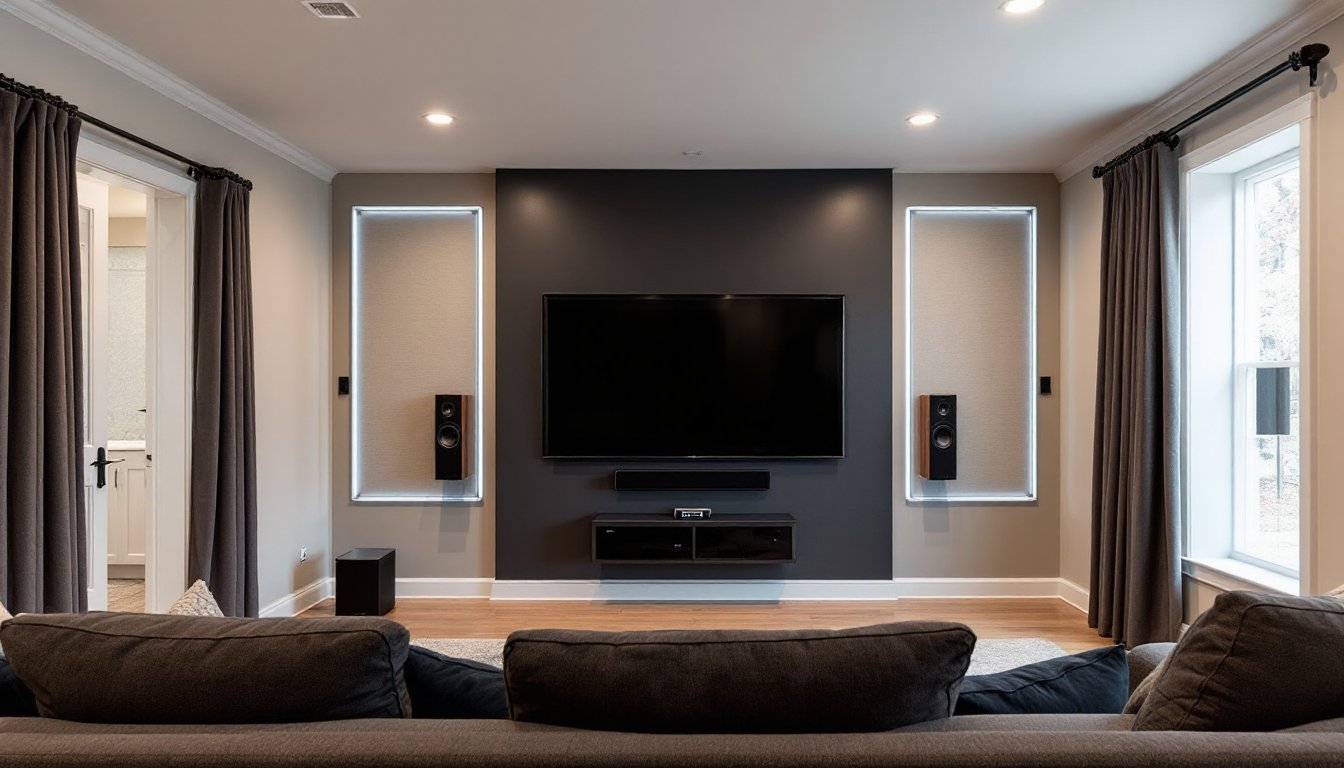
Start with a 5.1 channel layout: a center speaker above or below the display (dialogue comes from here), left and right front speakers flanking the screen, and two surround speakers along side or rear walls at ear level. A subwoofer handles bass, get a powered model (built-in amplifier) rated for your room size: a 10-inch sub works for rooms under 200 square feet, a 12-inch for larger spaces.
Speaker placement matters more than you’d think. The center speaker should be at ear level when seated, ideally mounted on a wall stand or fitted into a cabinet opening. Left and right fronts sit 6–12 inches above ear level, toed in slightly toward the listening area. Surrounds go high on side walls (8–10 feet up) or on rear walls: they fill space with ambient sound, not dialogue, so perfection isn’t critical here.
Place the subwoofer in a corner or along a wall: bass travels in waves and sounds similar from any position, so prioritize what looks clean. If one spot causes a dead zone (a seat where bass disappears), move it slightly.
Recent smart home device reviews show that many quality speakers now include wireless connectivity, making installation tidier in finished rooms where running cables is tricky.
Design and Layout Considerations for Your Space
Room geometry affects everything. A rectangular room with parallel walls is easier to treat acoustically than an L-shaped or open-concept space. If you’re starting fresh, aim for a room roughly twice as long as it is wide, this natural proportion minimizes standing waves (frequencies that boom or disappear at certain listening spots).
Seating distance matters. A 4K TV needs viewers within 6–10 feet for detail clarity: a projector and screen works better at 10–20 feet. Measure your room and choose your display type based on realistic viewing distance.
Projector rooms require blackout capability. If your space has windows, invest in quality blackout shades or build a frame with blackout fabric. Partial light wash washes out image detail: you’re paying for brightness that’s wasted. For a basement or dedicated room, blackout is easier. For a living room that doubles as theater, a TV might be the smarter choice.
Optimizing Room Acoustics and Lighting
Hard surfaces reflect sound, creating echo and muddiness. Absorb reflections with acoustic panels, bass traps, and soft furnishings (curtains, rugs, upholstered furniture). You don’t need a room wrapped in foam, strategic placement works. Place panels behind and beside speakers, across the ceiling’s center (addresses early reflections), and in room corners (bass traps). Budget $500–$1,500 for basic acoustic treatment in a 15×20-foot room.
Lighting control is essential. Ambient light behind the screen reduces contrast: you’ll crank volume to compensate and tire faster. Install dimmable overhead lights, or switch to a dedicated wall-mounted LED strip that provides soft background glow without washing out the display. Sconces flanking seating areas give task lighting without creating glare. Consider smart bulbs that integrate with your theater control system, one button dims everything to movie mode.
If you’re sealing a dedicated room, leave outlets on opposite walls from your display for future flexibility. Standard spacing is one outlet every 6 feet: you’ll need dedicated circuits for power-hungry equipment (receiver, projector). Consult a licensed electrician if running new circuits, some municipalities require permits for added electrical work. This isn’t a DIY task if you’re unfamiliar with your panel and local codes.
Budget-Friendly vs. Premium Home Theater Solutions
A bare-bones setup runs $800–$1,500: a decent soundbar ($300–$500), a solid TV ($400–$800), and a streaming device ($50–$150). It’s better than stock TV speakers but not a true surround experience.
A mid-range system ($3,000–$6,000) adds real audio: quality 5.1 speakers ($2,000–$4,000) paired with a good 4K TV ($800–$1,500), plus cables and mounting hardware. This hits the “wow” factor for most rooms without obsessive tweaking.
A premium setup ($10,000+) includes a high-end projector ($3,000–$5,000), a motorized screen ($1,500–$3,000), audiophile speakers ($4,000–$8,000), acoustic treatment ($1,000–$2,000), and custom integration (wiring, seating, control systems, $2,000–$5,000+). This is genuinely impressive but requires commitment to a dedicated space.
Most Raleigh homeowners see best value in the $4,000–$8,000 range: a quality 65–75-inch 4K TV, a 5.1 speaker setup, and proper cable management. This avoids over-spending on features you won’t use while still delivering a genuine upgrade. Plan for acoustic treatment separately, spread it over a few months as you fine-tune the room.
Don’t buy everything at once. Start with display and main speakers, live with it for a month, then add surrounds and a subwoofer. You’ll learn what the room actually needs instead of guessing.
Finding Local Raleigh Home Theater Professionals and Retailers
Raleigh has solid options for both retail and installation. Big-box stores (Best Buy, Walmart) stock entry-to-mid-level gear: returns are easy, but staff expertise varies. Specialty AV retailers, look for local shops downtown or in suburban areas, offer deeper knowledge and often provide in-home consultations. They’ll measure your space, discuss your goals, and recommend gear that fits your actual use, not just trend.
For professional installation, verify that installers are licensed and insured, especially if running new circuits or cutting into walls for speaker placement. Check references and ask about cable management, sloppy wiring looks unprofessional and causes headaches if equipment fails. Many installers offer a service plan: clarify what’s covered before signing.
Raleigh-area home theater professionals are rated and reviewed by homeowners, making vetting easier. Read feedback on installation quality, post-sale support, and whether they stood behind their work. A contractor who’s installed 50 systems in Raleigh knows local building codes and won’t recommend a projector setup for a room with east-facing windows that won’t darken.
If you’re mostly DIY-capable, hire professionals for structural work (cutting into walls, running new electrical circuits) and installation of ceiling-mounted speakers. Handle cable runs yourself if your walls are accessible, and do your own speaker calibration, most AV receivers include a calibration microphone, and online guides walk you through it in 30 minutes.