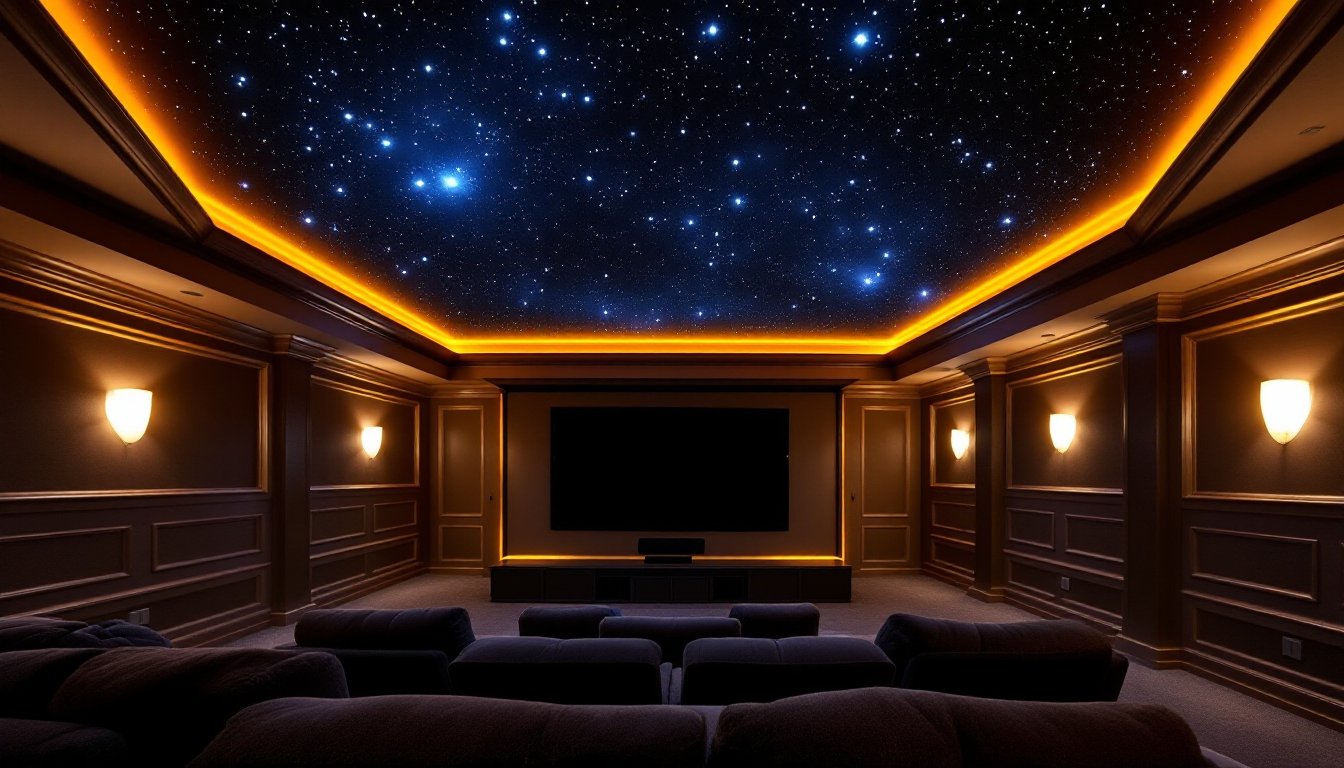
Imagine lying in your home theater, watching your favorite movie while a gentle constellation drifts overhead. A home theater star ceiling delivers exactly that, a customizable night sky that transforms an ordinary room into a captivating retreat. Whether a homeowner wants to create a luxury media space or simply add a touch of wonder to an existing setup, fiber optic systems and LED-based solutions make this project achievable for DIYers willing to plan ahead and commit to the installation. This guide walks through what’s available, how to choose the right system, and how to install it successfully.
Table of Contents
ToggleKey Takeaways
- A home theater star ceiling uses fiber optic systems or LED panels to create a customizable night sky that adds luxury ambiance without generating excess heat, making it ideal for enclosed media spaces.
- Fiber optic systems deliver the most realistic twinkling effect with minimal heat dispersal, though installation is labor-intensive and costs $1,500–$5,000+, while LED panels offer simpler setup and smart app control for $800–$3,500.
- Before starting your star ceiling project, measure your ceiling, identify joists or grid lines, and decide on coverage area—full ceiling coverage creates dramatic impact, but partial accent coverage is a beginner-friendly option.
- Installation requires drilling ¼-inch holes, routing fiber strands or LED wiring through ceiling cavities, and securing components with trim rings or panel frames; plan 4–8 hours per 100 fibers for fiber optic systems.
- Both fiber optic and LED star ceilings require minimal maintenance, with annual checks of light source bulbs (halogen bulbs last 1,000–2,000 hours) and monthly dusting of LED surfaces.
- A home theater star ceiling increases resale appeal, syncs with movies or music, and reduces eye strain during long viewing sessions while consuming modest power and remaining completely silent.
What Is a Home Theater Star Ceiling?
A home theater star ceiling is an illusion of a night sky created by embedding fiber optic lights, LED panels, or small light sources into a finished ceiling. The effect ranges from subtle twinkling points of light to fully programmable displays that mimic constellations, meteor showers, or color-changing sequences.
There are two main approaches: fiber optic systems use thin glass filaments that carry light from a distant power source, and LED-based systems incorporate small LED bulbs or panels directly into or behind the ceiling material. Both create dramatic visual interest without generating the heat of traditional lighting, making them ideal for enclosed home theater spaces where cooling matters.
These systems suit various ceiling types, drywall, suspended tiles, or custom frames, and can span from a small accent area to a complete ceiling coverage. Installation difficulty ranges from moderate (hanging pre-made panels) to advanced (running hundreds of fiber optic strands through joists and securing them flush with the finished surface).
Benefits of Installing a Starry Ceiling in Your Home Theater
A starry ceiling adds visual drama and cost-effective ambiance compared to traditional theater lighting. It softly illuminates the room without competing with screen content, reduces eye strain during long viewing sessions, and can be programmed to sync with movies or music. Resale appeal also increases, luxury design touches in media spaces attract buyers and justify higher asking prices.
Beyond aesthetics, these systems run cool (especially fiber optics) and consume modest power, keeping energy bills manageable. They’re also noise-free, a critical factor in a home theater where acoustic control is paramount.
Fiber Optic Systems
Fiber optic star ceilings deliver the most realistic “twinkling” effect because each light point is discrete and can twinkle independently. A single light source (often a 150–250-watt halogen or LED projector) sits in an attic or utility space, directing light through thousands of thin fiber optic strands that poke through the ceiling surface.
Advantages include minimal heat dispersal (the light source is remote), precise point-to-point control, and a long lifespan for the fiber itself (20+ years). A homeowner can choose constellation patterns, customize brightness, and even program twinkling sequences. The trade-off: installation is labor-intensive, running fibers through ceiling cavities, anchoring them, and sealing gaps requires patience and multiple hands. Materials typically cost $1,500–$5,000+ depending on coverage area and light source quality.
LED Light Panels and Smart Controls
LED panels embed into suspended ceiling grids or mount behind translucent drywall, offering simpler installation than fiber optics. Modern systems are Wi-Fi enabled and controllable via smartphone apps, allowing color shifts, dimming, and scene selection without rewiring.
LED systems heat less than halogens, consume less power, and offer faster setup, many snap into existing frames or drop into ceiling tiles. But, individual LED points may appear less like “stars” and more like a grid, depending on the panel density and diffusion layer. Costs range from $800–$3,500 for a mid-sized room. Smart integration is a major draw, homeowners can set the ceiling to aurora displays, warm amber tones, or cool deep blues to match movie genres or time of day.
Planning Your Star Ceiling Project: Materials and Design Choices
Before purchasing anything, measure your ceiling area and identify joists or suspension grid lines. Sketch a basic layout showing where light sources will mount, where fibers or LED wiring will run, and which access points (attic, crawl space) you’ll use for installation.
Decide on coverage: Do you want a full night sky, a constellation band across one wall, or scattered accent points? Full coverage requires more materials and labor but delivers dramatic impact. Partial coverage is a smart beginner approach, less material, fewer drilling points, and easier concealment of wiring.
Consider your ceiling type. Drywall ceilings require drilling small holes (typically ¼-inch for fiber optics) and patching around them, while suspended tile ceilings in basements are ideal for LED drop-in panels. Popcorn or textured ceilings demand careful hole placement and touch-up afterward. Speak with the ceiling installer or reference the IRC (International Residential Code) if structural integrity is a concern, you’re working within living spaces, so load calculations matter.
Gather materials based on your chosen system. For fiber optic: light source unit, fiber optic cable (usually sold by the 100-foot spool), ceiling anchors, and sealant or trim rings. For LED: panel kit (check compatibility with your ceiling grid), smart controller, wiring, and any diffusion panels. Measure twice, running short on materials mid-project is costly and delays completion. Most suppliers offer star ceiling panels with realistic night sky effects sized for standard rooms, which can guide your material selection.
Step-by-Step Installation Guide for Beginners
Safety first: Wear safety glasses when working overhead and use a stable ladder or scaffold. If running electrical to the light source, ensure a licensed electrician handles the circuit or permits if required by local code.
Steps for fiber optic installation:
- Mount the light source in the attic or utility space directly above (or nearby) your ceiling. Secure it to a stud or joist using a bracket rated for its weight.
- Map out your desired star pattern on the ceiling using a chalk line or pencil. Lightly mark each hole location using a template or 1:1 scale drawing.
- Drill holes at marked points using a ¼-inch bit (check your fiber’s gauge). Wear a dust mask to contain drywall particles.
- Insert fiber optic strands through each hole, starting from the light source. This is tedious, plan for 4–8 hours per 100 fibers, depending on ceiling layout and obstruction.
- Seal the light source end into the projector unit following the manufacturer’s wiring diagram. Secure loose fibers along joists with tape or cable clips, avoiding kinks that reduce light transmission.
- Trim fibers flush with the ceiling surface and sand endpoints smooth. Install trim rings or bezel covers to hide rough edges.
- Power on and test twinkling and brightness settings.
Steps for LED panel installation:
- Measure your suspended grid and verify panel sizes match the openings (typically 2×2 or 2×4 foot panels).
- Cut and install any necessary wiring runs to the controller location (usually near an outlet or switch).
- Drop panels into the grid frame as you would standard ceiling tiles. Ensure they sit flush.
- Run smart controller cables behind the tiles to a central hub or wall-mounted unit.
- Power on, download the app, and pair the controller via Wi-Fi.
- Test all color modes and dimming to confirm function.
Both methods benefit from having a second pair of hands, one person holding the ladder steady or managing fiber routing while the other drills, measures, or secures components. A professional star ceiling installer can handle complex runs if your comfort level is low.
Maintenance and Troubleshooting Tips
Fiber optic ceilings require minimal upkeep. Check the light source unit annually, halogen bulbs dim over time and may need replacement every 1,000–2,000 hours. Keep the light source fan clean of dust to prevent overheating. If individual fibers go dark, they may be kinked or severed: trace the run and straighten or replace as needed.
LED panels are similarly low-maintenance. Dust the surface gently with a microfiber cloth monthly. If modules fail, they’re typically plug-and-play replacements. Smart controllers may need software updates, check the manufacturer’s app periodically.
Common issues:
- Dimly twinkling fibers: Realign or reseat fibers in the light source projector. Ensure no cables are bent tightly.
- Uneven brightness across the ceiling: Light sources farther away appear dimmer. Consider adding a second light projector for large areas or upgrading the wattage.
- LED color inconsistency: Reset the smart hub and re-pair panels via the app. Calibrate white-balance settings if available.
- Drywall patch visible around holes: Touch up with spackle and ceiling paint. Sand smooth and blend with overhead lighting off to hide imperfections.
For electrical failures or complex rewiring, consult a licensed electrician. Most fiber optic and LED manufacturers offer warranty coverage (3–10 years) on components, so keep receipts and registration documents.