Setting up a home theater in Nashville doesn’t require hiring a contractor for every step. With the right planning, equipment choices, and a clear understanding of what you can DIY versus what needs professional help, you can create a high-quality entertainment space that fits your budget and lifestyle. This guide walks you through the key decisions, from sizing your room and selecting gear to running cables and integrating smart controls. Whether you’re converting a spare bedroom or finishing a basement, you’ll find practical advice that keeps the work manageable and the results impressive.
Table of Contents
ToggleKey Takeaways
- Home theater installation in Nashville can be completed with a hybrid DIY and professional approach, reducing costs while ensuring technical quality through selective contractor use.
- Plan your room layout, measure viewing distances (1.5 to 2.5 times screen diagonal), and account for acoustic treatment ($300–$1,000) before purchasing equipment to ensure optimal results.
- Invest in quality core components—projector, AV receiver, and speakers—as the system’s performance depends on its weakest link, with modest setups starting at $2,000–$4,000.
- Professional help is essential for structural modifications, electrical work requiring permits, and smart home automation integration, while DIYers can handle speaker mounting, cable routing, and receiver configuration.
- Proper cable management using in-wall rated HDMI (CL3/CL2), flexible conduit, and strategic speaker placement (center at ear level, fronts at 30 degrees) creates a polished, functional entertainment space.
Planning Your Nashville Home Theater: Budget, Space, and Design Considerations
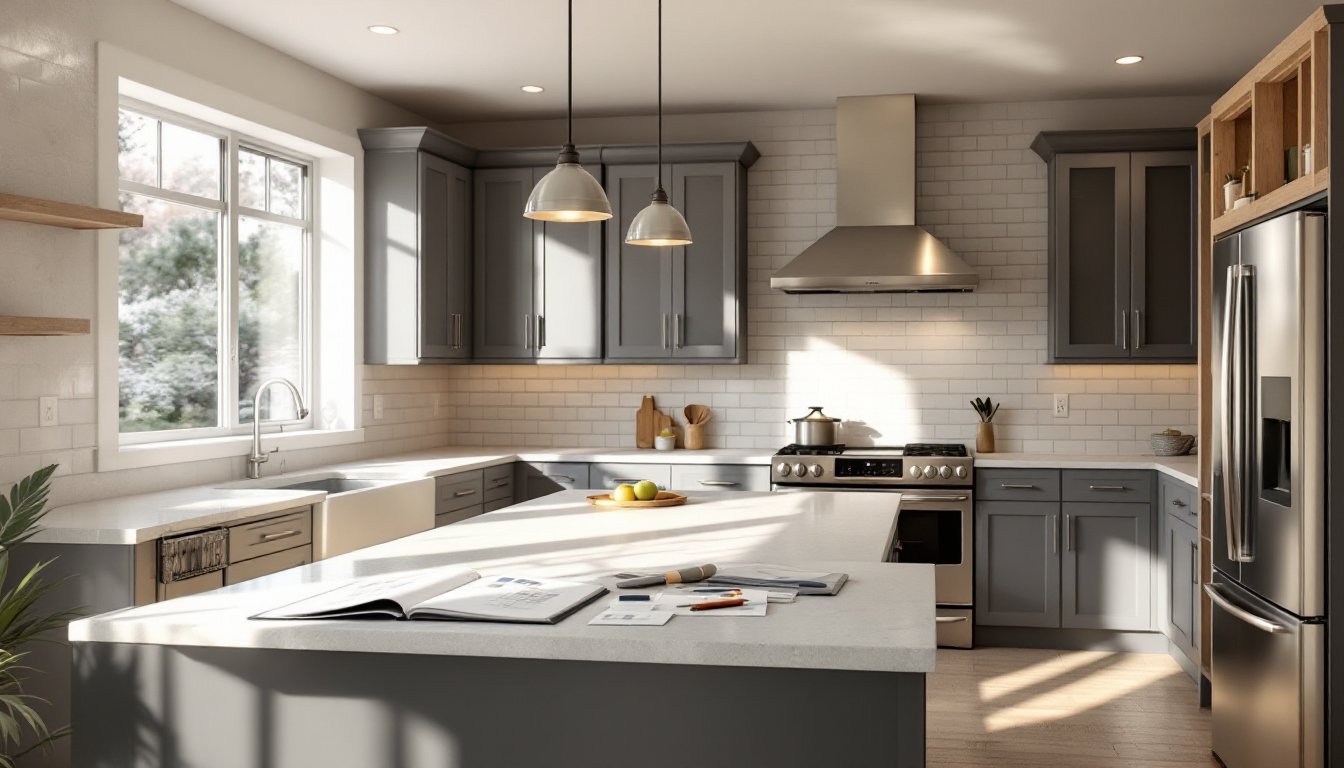
Before spending a dime on equipment, measure your room and establish realistic expectations. A home theater thrives in a dedicated, enclosed space, ideally 12 by 16 feet or larger, though smaller rooms work if you optimize layout. Room shape matters. A rectangular space is easier to treat acoustically than an L-shaped or open floor plan, so assess whether you need to add wall treatments to control echoes and bass.
Budget varies wildly depending on your goals. A modest single-room system (projector, basic surround speakers, entry-level receiver) can run $2,000 to $4,000. Multi-room setups with premium acoustics, lighting control, and zones cost $5,000 and up. When planning, remember to factor in installation labor if you’re not comfortable running cables through walls or mounting heavy equipment. Nashville-area contractors typically charge $50 to $150 per hour for labor, and a full installation may take 20 to 40 hours depending on complexity.
Design the layout first. Decide where seating will sit relative to the screen, then work backward to position the projector and speakers. Viewing distance from a projector screen should be 1.5 to 2.5 times the screen diagonal: a 100-inch screen means viewers sit 12.5 to 20 feet away. If your room is tight, a smaller screen or a quality television might serve you better than struggling with projector placement. Sketch the room on paper, mark electrical outlets, and identify any structural obstacles (ceiling joists, beam placements, HVAC ducts) before committing to mounting locations.
Acoustic treatment is often overlooked by DIYers but directly impacts enjoyment. Hard surfaces like drywall, tile, and hardwood reflect sound, creating muddy audio. You don’t need a fully treated studio, but adding bass traps in corners, acoustic panels on the front wall behind the screen, and soft furnishings (rugs, curtains, upholstered seating) will dramatically improve clarity. This prep work costs $300 to $1,000 and is worth every penny.
Essential Equipment for a Professional-Grade Home Theater System
A complete home theater setup includes a projector or display, screen, AV receiver, speakers, and cables. Don’t skip quality components in favor of bargain-basement gear: a system is only as good as its weakest link, and a cheap receiver will bottleneck premium speakers.
Choosing the Right Projector and Screen for Your Room
Projectors offer immersion that flat screens can’t match, but they demand a dark, controlled room. A 4K projector in the $1,500 to $3,000 range (brands like Epson, BenQ, and Optoma) delivers solid contrast and brightness for residential viewing. Lumens (brightness) matter, aim for 1,500 to 2,500 lumens for a dark room. If your room has windows or you plan to watch during the day, bump that to 3,000+ lumens.
Screens are sized diagonally and measured in feet. A 120-inch screen is common for dedicated theaters: a 100-inch fits smaller rooms. Material choice is critical: matte white screens are forgiving with seating angles and work well for moderate lighting conditions, while gray screens add contrast in darker rooms. Motorized, acoustically transparent screens (fabric with holes allowing sound to pass through) cost $800 to $2,000 but let you position speakers behind the screen for cleaner aesthetics.
If a projector isn’t practical for your space, a high-quality OLED or QLED television (65 to 85 inches) is a solid alternative. Modern TVs have excellent motion handling and HDR (High Dynamic Range) support, making them ideal for sports and gaming alongside movies.
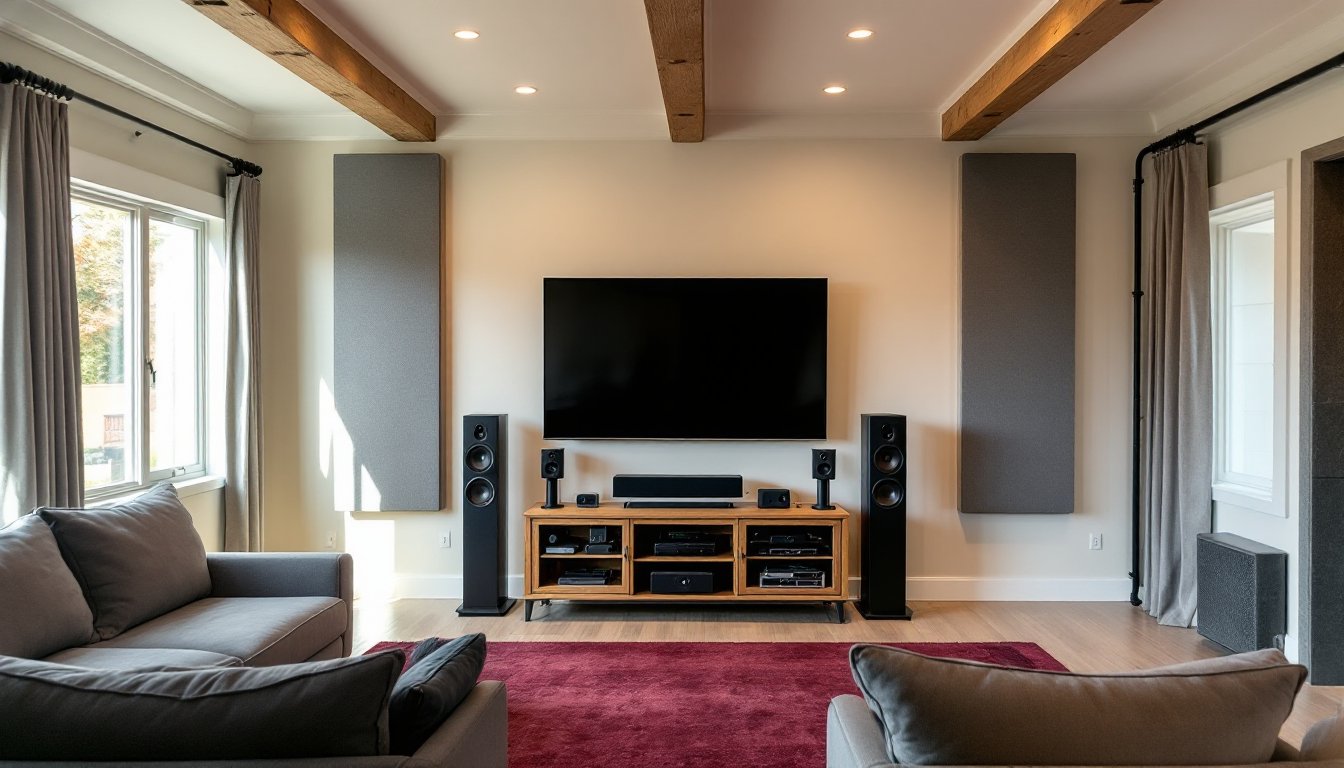
Audio Systems: Surround Sound Setup and Speaker Placement
Audio makes or breaks the experience. A basic 5.1 surround system includes a center channel (dialogue and on-screen sounds), left and right front speakers (main audio), two surround speakers (ambient and off-screen effects), and a subwoofer (bass below 100 Hz). Upgrading to 7.1 or Atmos (height speakers for three-dimensional sound) costs more but is worth it if your budget allows.
Speaker placement is just as important as the speakers themselves. Mount the center channel at ear level, directly above or below the screen. Position left and right front speakers at 30-degree angles from the center point of seating. Surround speakers go on side or rear walls, about 1 to 2 feet above ear level when seated. The subwoofer can sit in a corner or center-front: corner placement boosts bass output but may create nulls (dead spots): experiment with placement to balance the room.
Budget-friendly brands like Klipsch, Micca, and SVS offer excellent value at entry-level prices ($200 to $600 per speaker). Mid-tier options from Yamaha, Denon, and Paradigm run $500 to $1,500 per speaker. The receiver should have enough amplification to drive your speakers (measured in watts per channel at rated impedance) and support the latest audio formats (Dolby Atmos, DTS:X).
DIY Installation vs. Professional Installation: What Works for Nashville Homes
Many DIYers can handle speaker mounting, cable routing, and calibration. Projector mounting and screen installation are moderate difficulty if you’re comfortable with a drill and wall studs. But, some tasks require licensed electricians or specialized contractors.
Handle DIY if you’re adding outlets, mounting speakers on walls, running cables behind walls (using a fish tape and proper conduit), and configuring the receiver via menu settings. Wear safety glasses and a dust mask when cutting drywall: use a stud finder to avoid electrical lines hidden in walls. Rent a drywall saw or use a rotary tool with a cutting bit for clean openings.
Hire a professional for structural modifications (moving load-bearing walls, adding significant electrical circuits), dedicated lighting systems with dimmers and home automation integration, and any work requiring permits. Nashville building codes require permits for electrical work above a certain scope and for modifications that affect structural integrity. Top-rated installation professionals in Nashville can handle end-to-end projects and often include calibration and warranty support.
Most Nashville homeowners find a hybrid approach works best: tackle the planning, layout, and speaker mounting themselves, then hire labor for electrical rough-in, wall prep, and AV calibration. This cuts costs while ensuring the technical aspects are done correctly. Labor savings often offset any inefficiencies in a DIY-heavy approach, especially on multi-room systems.
Wiring, Connectivity, and Smart Automation for Seamless Control
Running wires neatly is half the battle. Use in-wall rated HDMI cables (CL3 or CL2 certification) for video from source devices (streaming boxes, game consoles, Blu-ray players) to the receiver and projector. Audio cables (XLR or RCA) connect the receiver to speakers. Category 6A Ethernet cable future-proofs connectivity for networked devices and bandwidth-hungry services.
Route cables through walls using flexible conduit (PVC or plastic tubing) to protect them and allow future swaps without re-running. Drill holes at least 1.25 inches from studs and joists to avoid hitting hidden plumbing or electrical lines: use a voltage detector as a safety check. Label every cable end with masking tape so you don’t confuse HDMI sources six months later.
Smart home integration ties everything together. Systems like Crestron, Savant, or Control4 integrate lighting, blinds, temperature, and AV with a single app or voice command. Budget $1,500 to $5,000 for a professional-grade system: DIY-friendly options like Apple HomeKit or Amazon Alexa cost less but require manual setup and may lack seamless AV handoffs.
Cabinet design keeps gear organized and cool. Mount the receiver, subwoofer amp, streaming devices, and any processors in a closed cabinet with passive ventilation (open back, small fans if needed). Poor ventilation causes overheating and equipment failure: receivers draw 50 to 150 watts during operation and need airflow.
Test everything before closing walls or hiding cables. Run all equipment through a short film, a gaming session, and music playback to confirm HDMI handshakes, speaker routing, and subwoofer connection. Check audio levels using the receiver’s built-in calibration mic (if included) or hire an acoustician to fine-tune your room for optimal frequency response.
Conclusion
Building a home theater in Nashville is achievable without professional help for the entire project. Start with a solid plan that respects your room’s dimensions and budget, invest in quality core equipment (projector, speakers, receiver), and be strategic about which tasks you DIY and which you delegate. Proper cable management, acoustic treatment, and smart automation transform a collection of gear into a polished, functional entertainment space. Your finished theater will reward you for years with genuine movie-night magic, something a contractor can’t promise, but you can definitely build.