Home theater rooms demand lighting that plays a dual role: deliver a polished, cinema-like ambiance during movie nights while remaining flexible enough for everyday viewing and casual entertainment. Unlike living rooms or kitchens, where ceiling lights are mostly functional, home theater ceiling lights need to disappear when the show starts, and then snap into action when you need them. Getting this balance right transforms the space from a dark corner into a truly immersive viewing environment. The good news is that with modern LED technology, smart controls, and a solid installation plan, homeowners can build a lighting setup that delivers both aesthetics and practicality without very costly.
Table of Contents
ToggleKey Takeaways
- Home theater ceiling lights must balance immersive movie ambiance with everyday functionality, requiring dimmable controls that transition smoothly between full darkness and safe navigation.
- Recessed LED downlights positioned around the perimeter at 2 feet from walls form the foundation of theater lighting, avoiding screen glare and maintaining a sleek appearance without protruding into sightlines.
- LED strip lights and accent lighting offer flexible, adhesive-backed alternatives for indirect illumination and scene-setting, costing $30–$150 per roll with smart control integration via Alexa or Google Home.
- LED-specific dimmers and smart lighting scenes are essential for home theater ceiling lights, allowing independent zone control and one-tap transitions between movie, cleanup, and casual viewing modes.
- A complete home theater ceiling lighting setup typically costs $300–$600 and requires proper planning, electrical safety, and either DIY experience or professional installation for code compliance and fire prevention.
Why Ceiling Lights Matter in Home Theater Design
Proper ceiling lighting is the foundation of a functional home theater. Unlike a commercial cinema, your space needs to handle multiple activities: critical movie viewing, video game sessions, sports watching, and casual socializing. Ceiling lights set the mood and control how usable the room is when you’re not in full-screen mode.
The key insight is that your lighting design must allow you to transition smoothly between modes. During a film, lights should dim to near-zero to avoid screen glare and preserve contrast. But when the movie ends, you need enough illumination to move safely and see the room. This flexibility prevents the awkward fumbling in the dark that kills the theater experience.
Ceiling lights also reduce screen reflections and eye strain. If lights hang too low or shine directly at the screen, they wash out picture quality and create hotspots on the display. Proper positioning and dimming capability eliminate these distractions. Also, thoughtful ceiling light placement keeps cable runs clean and maintains a sleek, finished appearance, which matters when you’ve invested in acoustic panels or acoustic foam on the walls.
Recessed Lighting: The Foundation of Theater Ambiance
Recessed ceiling lights (also called can lights or downlights) are the workhorse of home theater lighting design. They sit flush with the ceiling, so they don’t protrude into your sightline and they won’t interfere with acoustic treatments or sound equipment.
For home theater, aim for 4-inch recessed housings in most residential ceilings: they’re easier to install than larger sizes and provide good light output without overkill. The placement matters: position lights around the perimeter of the ceiling, roughly 2 feet from the walls, rather than directly above seating. This keeps light off the screen and screen-mounted equipment, and it creates a subtle wash that defines the room without harsh shadows.
When selecting recessed fixtures, choose dimmable LED units rated for your ceiling type. If your theater room sits in a climate-controlled basement with minimal insulation concerns, standard recessed LEDs work fine. If you’re in an attic or over unconditioned space, buy airtight, rated fixtures to prevent energy loss and reduce HVAC strain. Look for models with color temperature between 2700K and 3000K (warm white): this mimics incandescent bulbs and creates a comfortable ambiance without harsh blues that tire the eyes during long viewing sessions.
Budget roughly $30 to $80 per fixture (housing, trim, and LED bulb included), depending on features. Quality brands like Juno, Halo, and Progress offer reliable dimming performance and long-lived LEDs. Installation requires cutting circular holes in drywall, running electrical wire, and securing the housing, doable for experienced DIYers, but hire an electrician if you’re unsure about load calculations or running new circuits.
LED Strip Lights and Accent Lighting for Mood Control
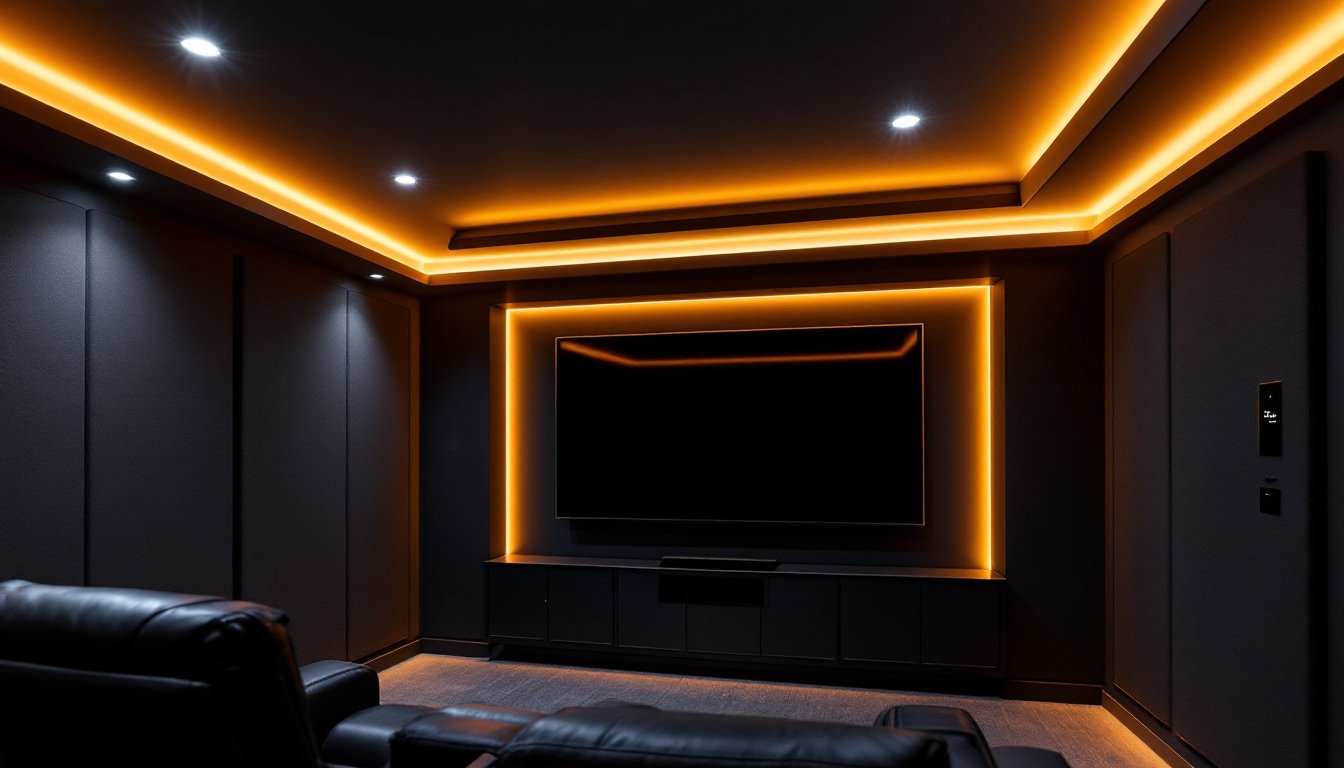
LED strip lights add another layer to your ceiling lighting strategy. Unlike recessed lights, strips are flexible, adhesive-backed, and can tuck into coves, soffits, or behind crown molding to cast soft indirect light. They’re perfect for accent lighting and scene-setting without the installation complexity of traditional fixtures.
In a home theater, LED strips shine along the ceiling perimeter or behind a tray ceiling to create a subtle halo effect. They won’t illuminate the screen or create glare if positioned correctly. Look for RGB strips or tunable white strips that let you adjust color temperature and brightness via remote or smartphone app. This gives you flexibility: cool white for setup and cleanup, warm amber or red dimmed low during viewing to minimize disruption if someone arrives late.
Installation is straightforward: clean the surface with a dry cloth, peel the adhesive backing, and press the strip into place. Most quality strips, brands like Nanoleaf, LIFX, and Govee, offer wireless control and integrate with Alexa or Google Home. They run on low-voltage DC power (usually 12V or 24V), so no heavy electrical work required: plug the transformer into a standard outlet and you’re done.
LED strip pricing ranges from $30 to $150 per roll depending on length and smart features. For a room with a 12-foot perimeter, budget $60 to $100 for a quality set. The benefit: instant scene-setting without rewiring, plus the ability to adjust color and intensity as your mood and viewing preference shift throughout the evening.
Dimmable and Smart Controls: Convenience at Your Fingertips
Dimming capability is non-negotiable in a home theater. A non-dimmable light set to full brightness is basically a spotlight pointed at your TV, useless for actual viewing. Ensure every ceiling light on your circuit is rated for dimming and paired with a compatible LED dimmer switch.
Standard incandescent dimmers work poorly with LEDs: they cause flickering and shortened bulb life. Instead, buy LED-specific dimmers from the fixture manufacturer or a trusted brand like Leviton or Lutron. These cost $15 to $40 per switch and communicate properly with LED drivers to avoid compatibility headaches. If you have multiple light zones (recessed lights in one area, strips elsewhere), install a dimmer for each group so you can adjust them independently.
Smart lighting takes convenience further. Wireless dimmer switches and app-based controls let you create scenes: a “Movie” scene that dims all ceiling lights to 5%, a “Cleanup” scene at full brightness, and a “Casual” scene at 30%. Smart bulbs and strips remember settings, so one tap on your phone or a voice command brings the room into the exact mood you want. Leading platforms include smart lighting solutions from manufacturers like Philips Hue, LIFX, and Nanoleaf, which offer seamless integration with Alexa, Google Home, and Apple Home.
Expect to spend $100 to $300 total for a complete smart dimming setup in a typical theater room, much cheaper than hiring an electrician to hardwire multiple dimmer zones. The payoff is significant: you’ll actually use your theater more because the lighting experience is smooth and intuitive.
Installation Tips for Home Theater Ceiling Lights
Before you install any ceiling fixture, check your attic or crawl space to understand what you’re working with. Identify where joists run, note any existing ductwork or plumbing, and confirm your ceiling can support the hardware. Most standard residential joists handle recessed fixtures without issue, but confirm with a quick inspection.
For recessed lights: Use a drywall saw or hole saw to cut 4-inch holes at your marked locations. Rough electrical work comes next, run 14-gauge or 12-gauge electrical wire (depending on circuit load) from your breaker panel or an existing outlet to each fixture location. If you’re extending an existing circuit, verify the panel has available amperage: if not, run a new dedicated 15-amp or 20-amp circuit. This is where hiring a licensed electrician makes sense, they ensure code compliance and safety.
Once wiring is in place, insert the recessed housing, adjust mounting bars or springs so it sits flush with the drywall, and secure. Insert the LED bulb and trim ring, then install drywall and tape/mud around the fixture.
For LED strips: Plan your route and test fit before committing. Strip mounting requires a clean, dry surface: wipe with rubbing alcohol if needed to remove dust and improve adhesion. Press firmly as you unroll, hold for 10 seconds every 12 inches. Connect the power transformer, hide the cable behind furniture or along the trim, and test all controls before closing up the space.
Safety essentials: Wear safety glasses during drywall cutting, shards drop into eyes easily. Use a stud finder to confirm where framing sits before cutting. Turn off power at the breaker before touching any wiring. If you’re uncomfortable with electrical work, hire a pro, rushing this step causes fires and code violations.
Dimmer integration: Wire dimmers in-line with your fixture circuit according to the dimmer manufacturer’s diagram. Top recessed light options are often pre-packaged with compatible dimmer bundles, which simplifies coordination. Test the dimming range before sealing up walls: some dimmer-and-LED combos have a minimum brightness floor (they won’t dim below 10%), which is worth knowing upfront.
Plan your layout thoughtfully: sketch the ceiling, mark light locations, count how many fixtures fit your circuit capacity, and confirm the total dimmer load doesn’t exceed 600W (or your dimmer’s rated maximum). A typical 15-amp circuit at 120V supports roughly 1,800W, so 6 to 8 LED downlights work comfortably.
For a single room installation, expect 2 to 4 hours if you’re running new wire and cutting drywall. Add another hour for dimmer wiring and testing. Home theater lighting guides can walk you through layout and dimming options if you need additional reference.
Conclusion
Smart ceiling lighting transforms a home theater from a dark room into a truly functional and immersive space. Start with recessed downlights positioned around the perimeter, add LED strips for accent and scene-setting, and layer on dimmable controls so you can shift from movie mode to everyday use effortlessly. The investment, typically $300 to $600 for a complete setup in an average room, pays off every time you settle in to watch. Take time during planning, don’t skip safety steps, and don’t hesitate to bring in a licensed electrician if you’re working with main panel circuits. Your eyes, and your family’s, will thank you.